Python | Anaconda
Installing Python with Anaconda
A Guide to Installing Python with Anaconda.
This tutorial is a write up of the installation instructions used for my “Introduction to Python Workshops” that I ran at Swinburne University of Technology. These workshops were targeted at Year 10 work experience students to learn the basics of loading data nd plotting with Python.
Python
Python is a programming language that is very popular and is used by many astronomers to perform their research. Some of the uses of Python include reading telescope data, analysing simulations and making graphs/plots of results. If you were you were to google ‘Install Python’ you would see many different options and versions of Python to install and from dfferent locations. It isn’t particularly clear which one you should use, how to install it and how to use it one you have.
Additionally, if you are using MacOS or Linux your computer likely already has a version of Python already installed to run the operating system. So installing a new version may cause some conficting issues with your computer, particularly if when you want to install more ‘Python packages’ (we will get to this later).
However there is much easier and better way to install Python. This is through using Anaconda.
Downloading and Installing Anaconda
Anaconda is distribution of Python designed for scientific computing. By installing Python through Anaconda, it makes managing and installing Python packages/versions significantly easier
You should be able to follow these instructions to install Anaconda on your system:
- Go to https://www.anaconda.com/products/individual and click on ‘Download’. It should take you to the bottom of the page to the different options (see Figure 1 below).
- Choose the installer for your operating system. You will probably want to use the graphical installer since it is much easier. Windows users note: You can only use a graphical installer, but you need to check if your system is 64-bit (most likely) vs 32-bit, then choose the appropriate one. You can check which type your computer is by clicking here and following the instructions.
- After the download completes, double click on the file to open the installer. It should like Figure 2 on Windows 10 or Figure 7 on MacOS Big Sur.
- Then follow either the Windows 10 or MacOS installation instructions that follows.
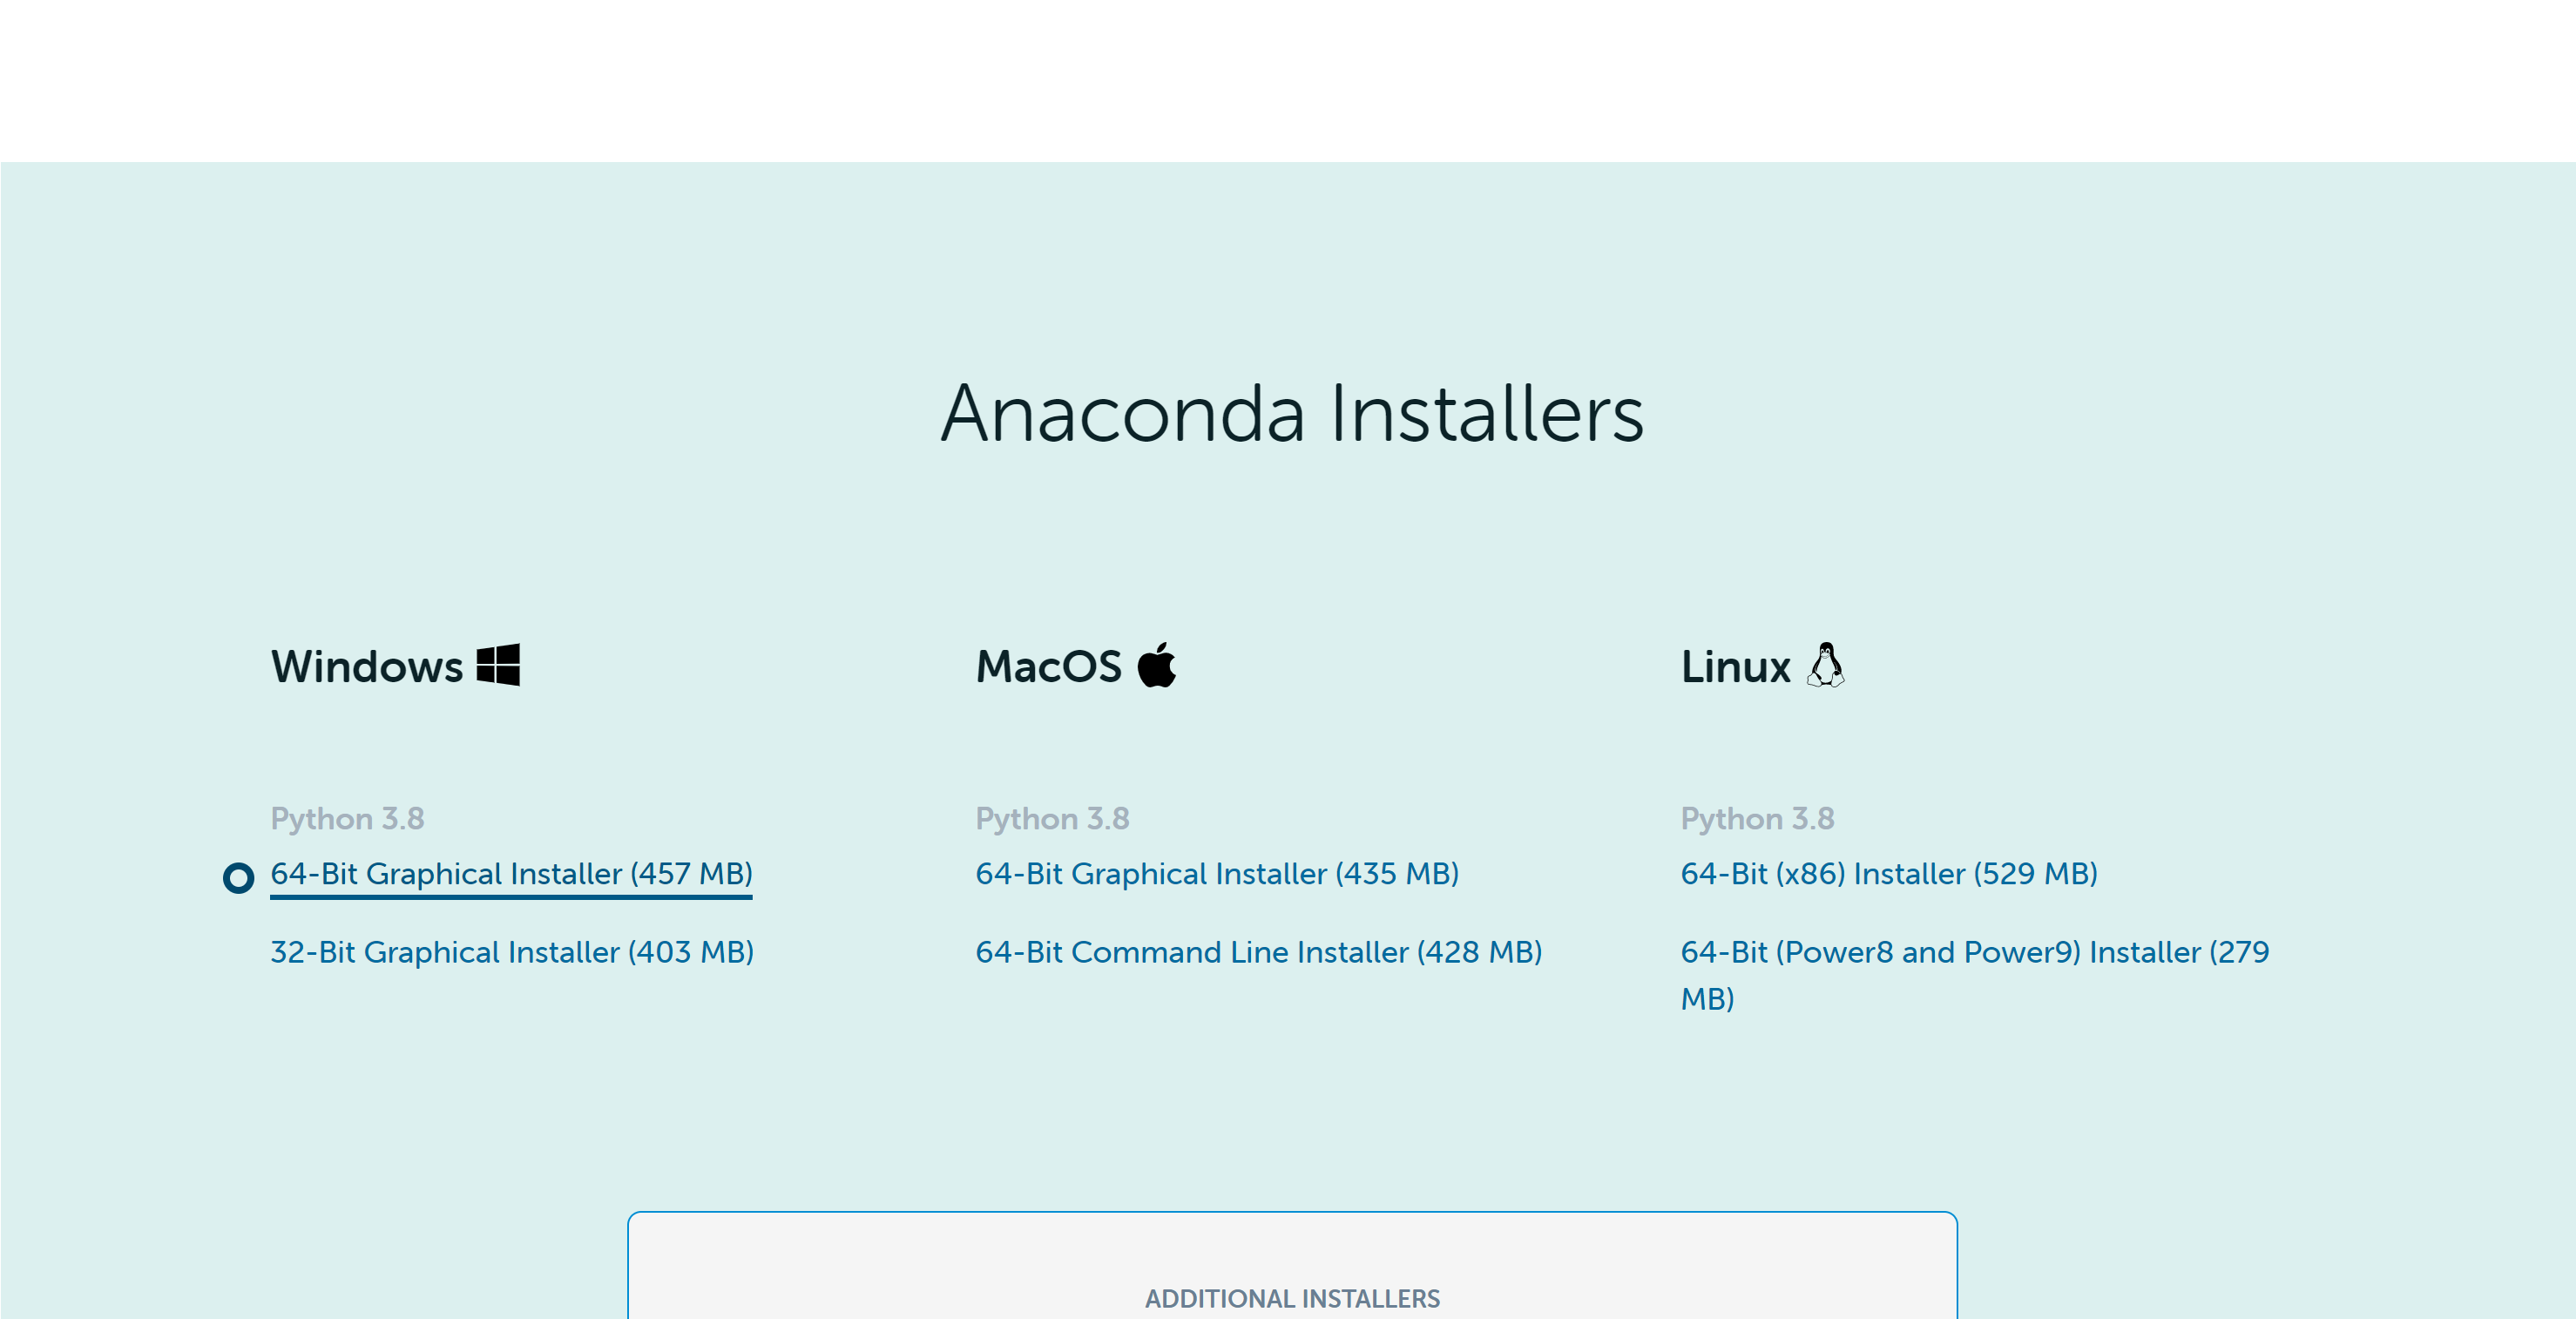
Figure 1 - Anaconda installation options. Choose the one that is appropriate for your computer.
Windows 10 Installation
- Click ‘I Agree’ to the licensing agreement (see Figure 3).
- Select to install for ‘Just Me’ then click ‘Next’.
- Choose location to install. The default location should be something
C:\\Users\<NAME>\anaconda3. This default location is normally recommended, but you can install it elsewhere. - Tick the boxes that say ‘Add Anaconda3 to my PATH environment variable’ and ‘Register Anaconda3 as my default Python 3.8’. See Figure 4. It will likely have a red warning that says the first option is not recommended, because it ‘makes anaconda get found before previously installed software’, but that is actually what we want to happen. It might also say a different number to Python 3.8 (i.e Python 3.9, 3.10, etc..), this is also okay.
- Continue to Section Anaconda Navigator.
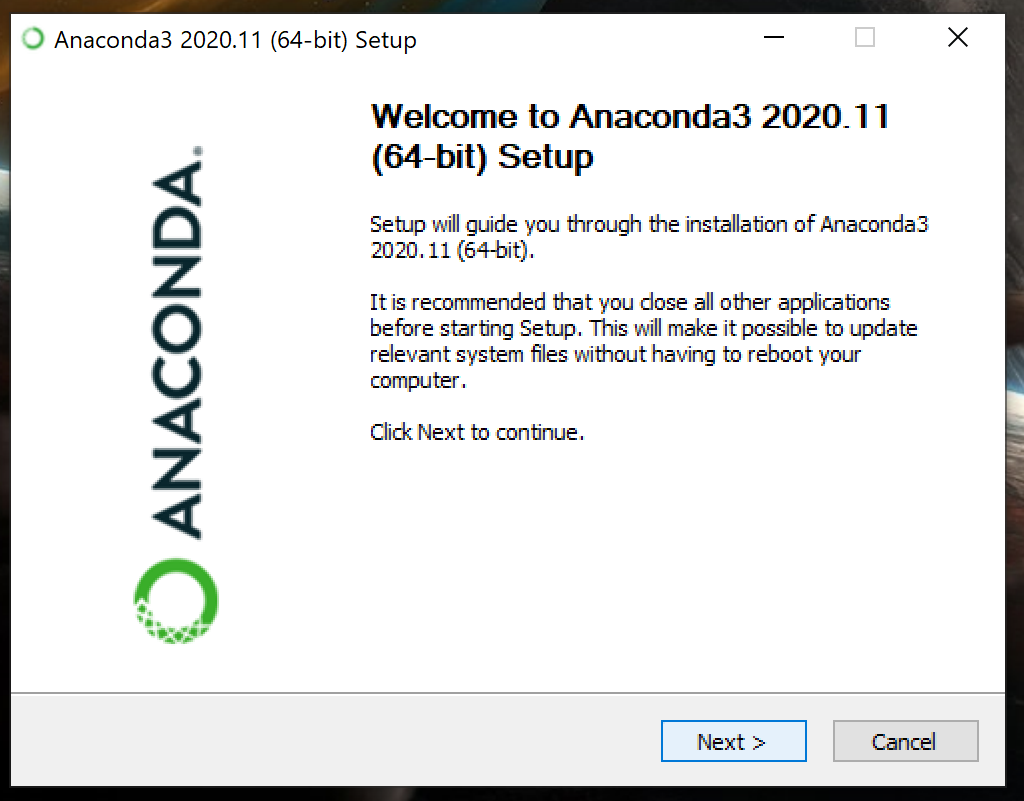
Figure 2 - Anaconda Installer (Windows 10)

Figure 3 - Anaconda License Agreement (Windows 10)
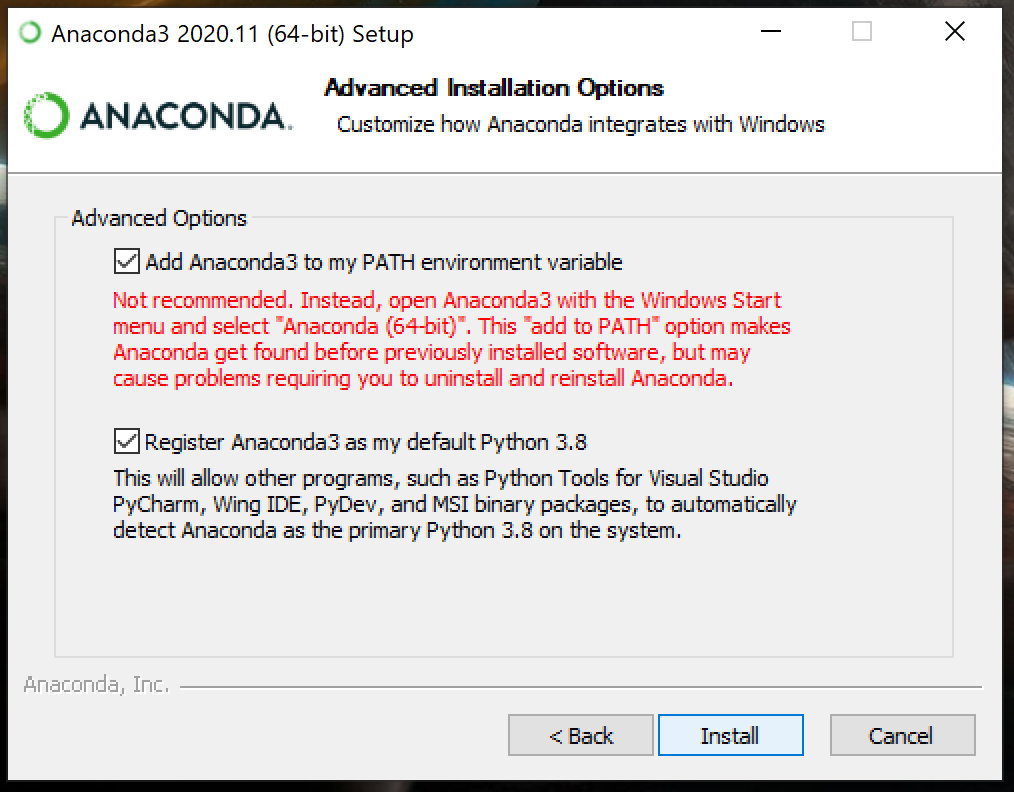
Figure 4 - Anaconda installation options on Windows 10. You want to tick both boxes.
MacOS Installation
- Click ‘Continue’ on Read Me to get to the licensing agreement.
- Click ‘Continue’ then ‘I Agree’ to the licensing agreement (see Figure 7).
- Click ‘Install’ on installation type. This will install anaconda in the default location, this is usually
/Users/<NAME>/opt/anaconda3. - Click ‘Continue’ after the installation is complete.
- Continue to Section Anaconda Navigator.
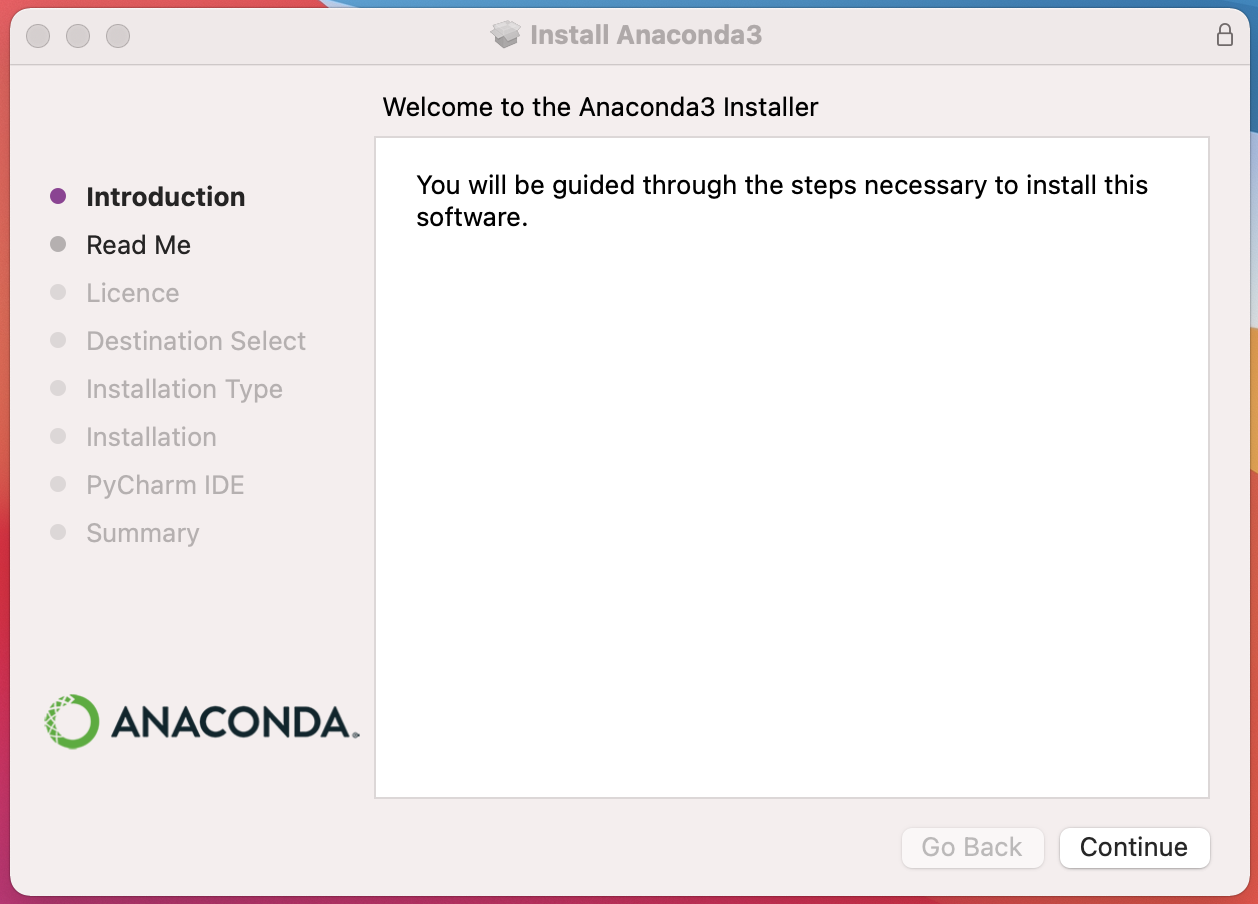
Figure 6 - Anaconda Installer (MacOS)
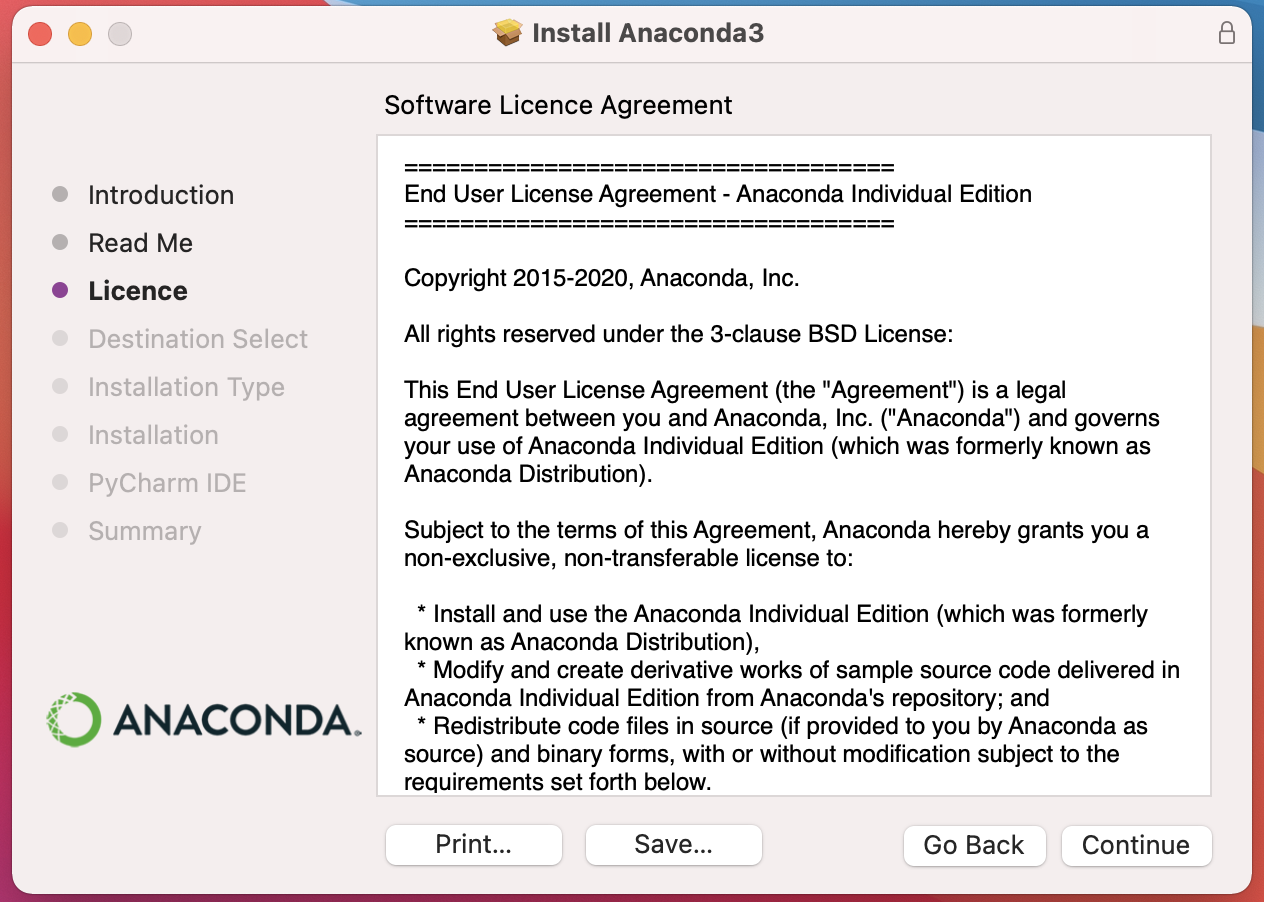
Figure 7 - Anaconda License Agreement (MacOS)
Anaconda Navigator
To check that Anaconda has been correctly installed we will attempt to open the Anaconda Navigator. You can load this program by doing the folowwing:
- Windows: Click the home button and search for ‘anaconda navigator’, then click to open
- MacOS: Click ‘Launchpad’ and search ‘anaconda-Navigator’, then click to open.
The program should look something similar to Figures 8 (Windows) and 9 (MacOS). Note that you may have different icons or tiles showing based on what is already installed on your computer. The important thing you should be able to see is something called ‘JupyterLab’ and ‘Jupyter Notebook’. If you can see both of these, then it has installed correctly and you are ready to start using Anaconda and Python.
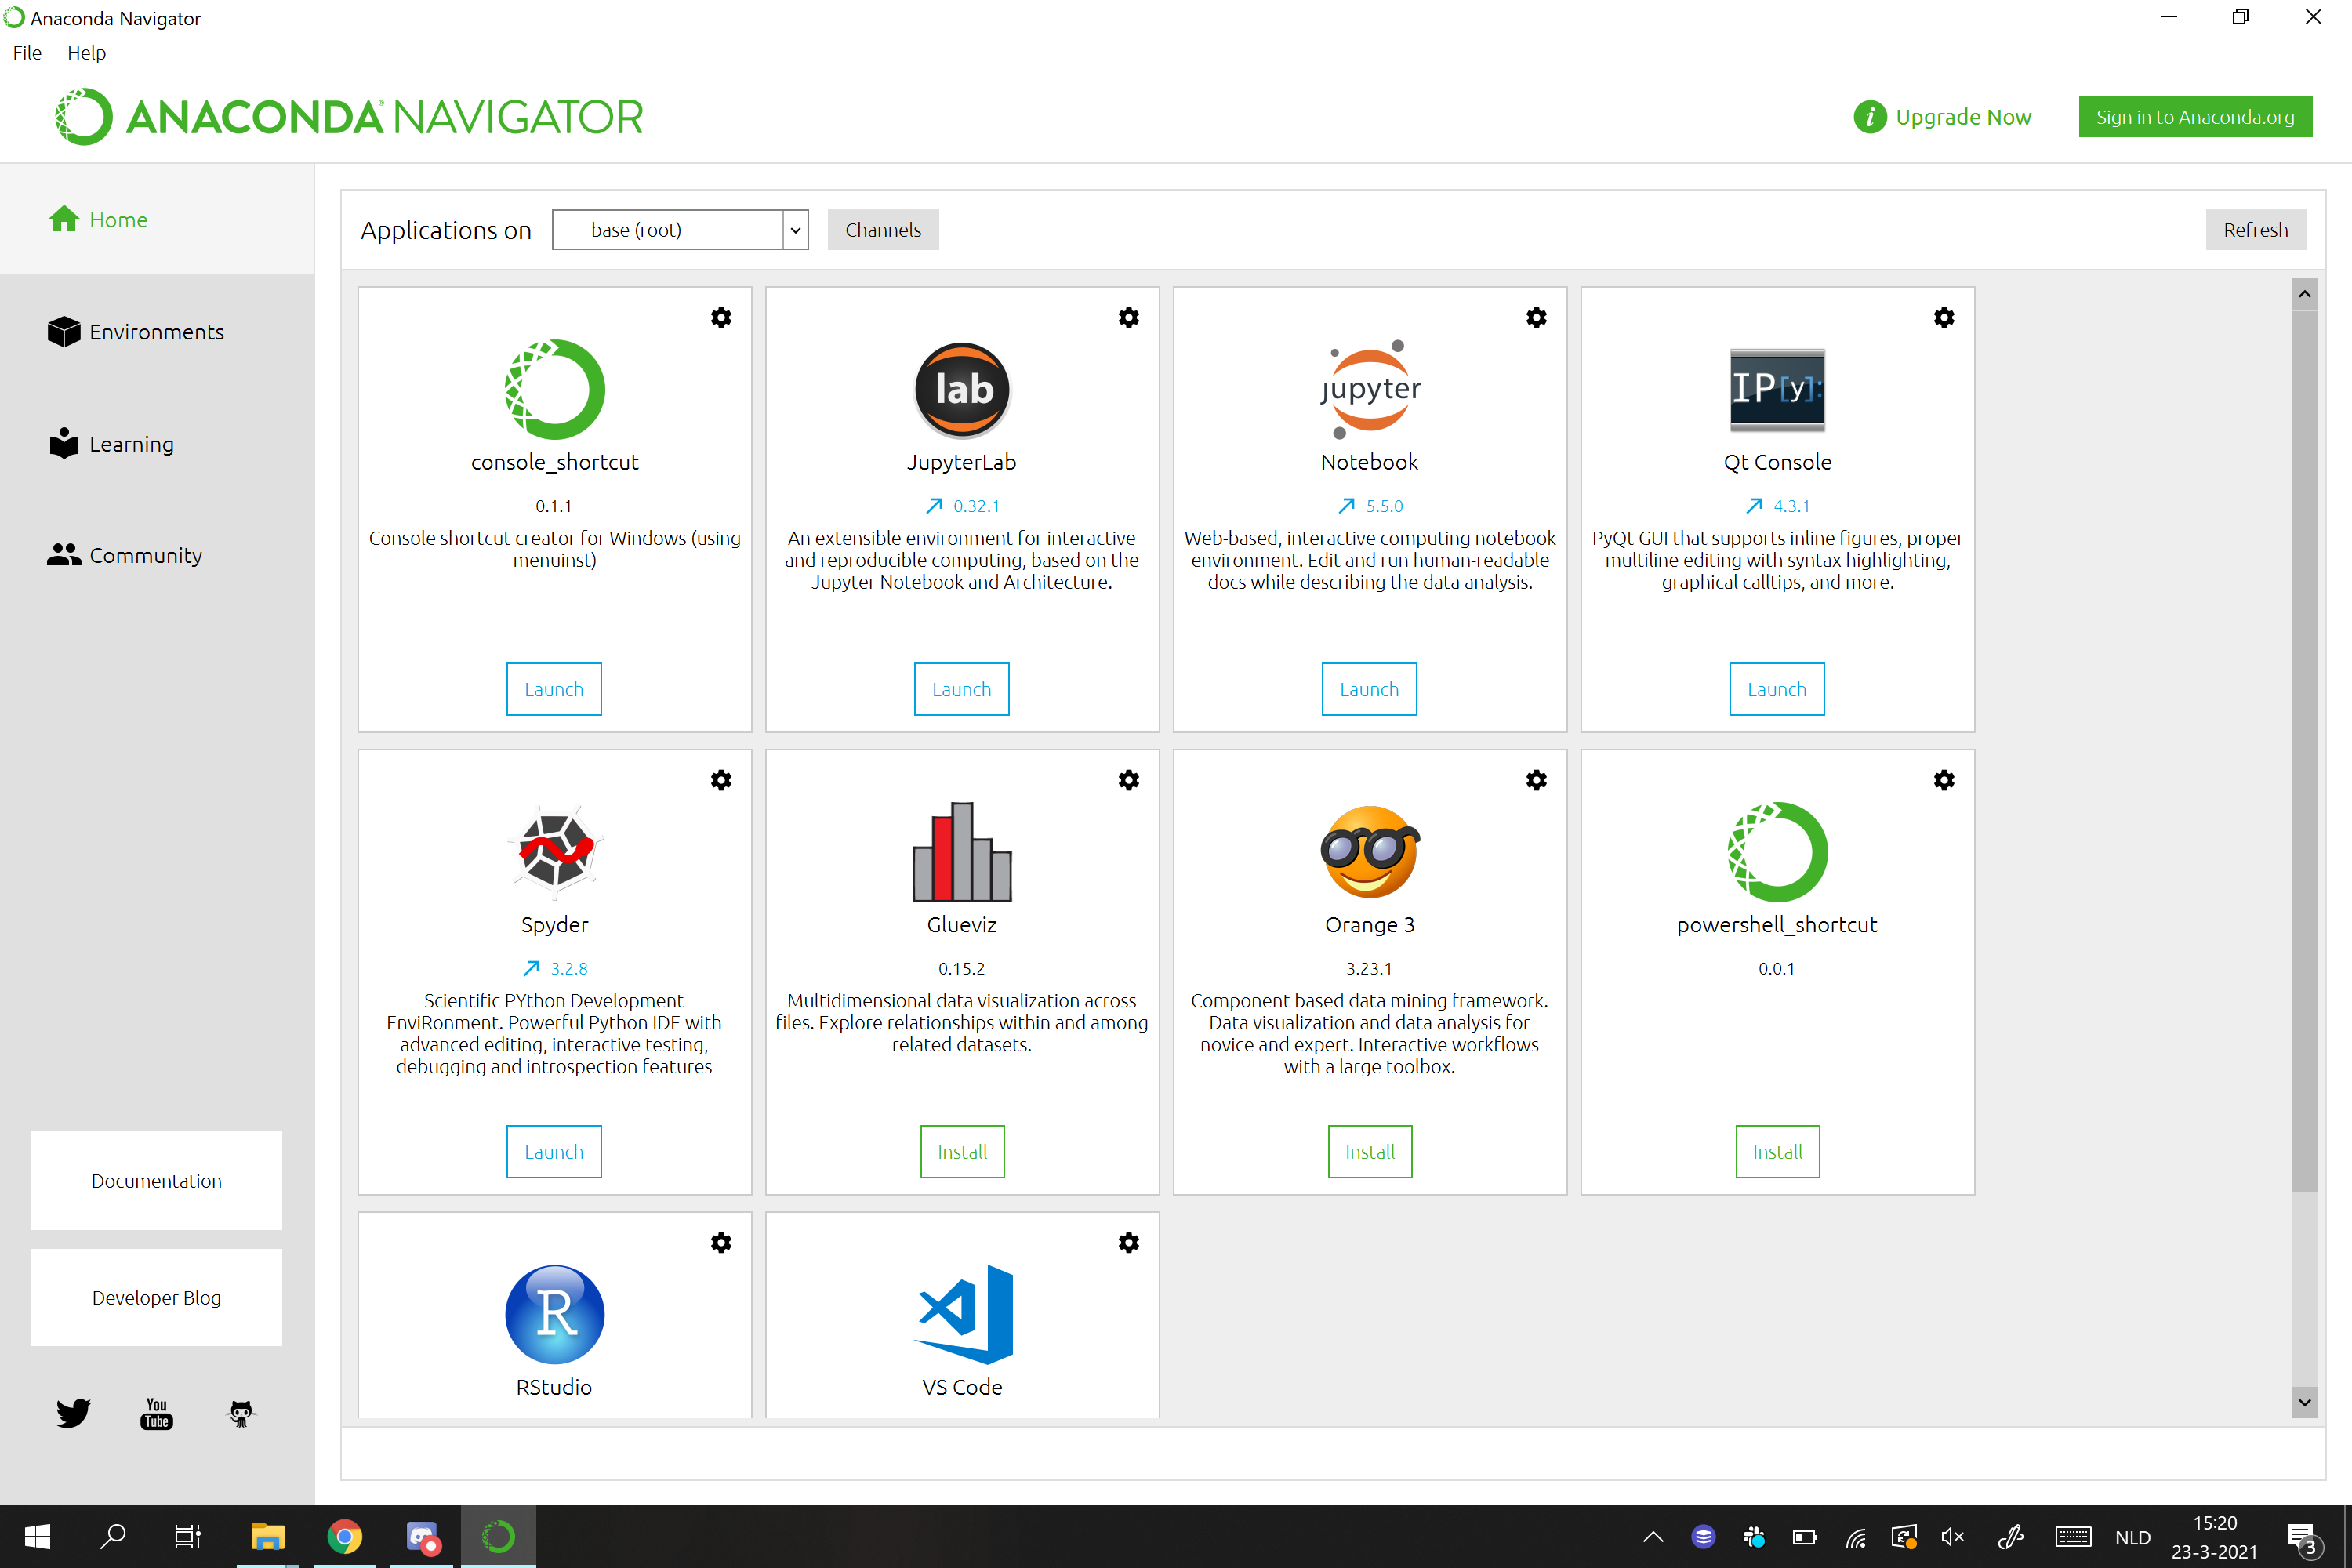
Figure 8 - Anaconda Navigator in Windows 10
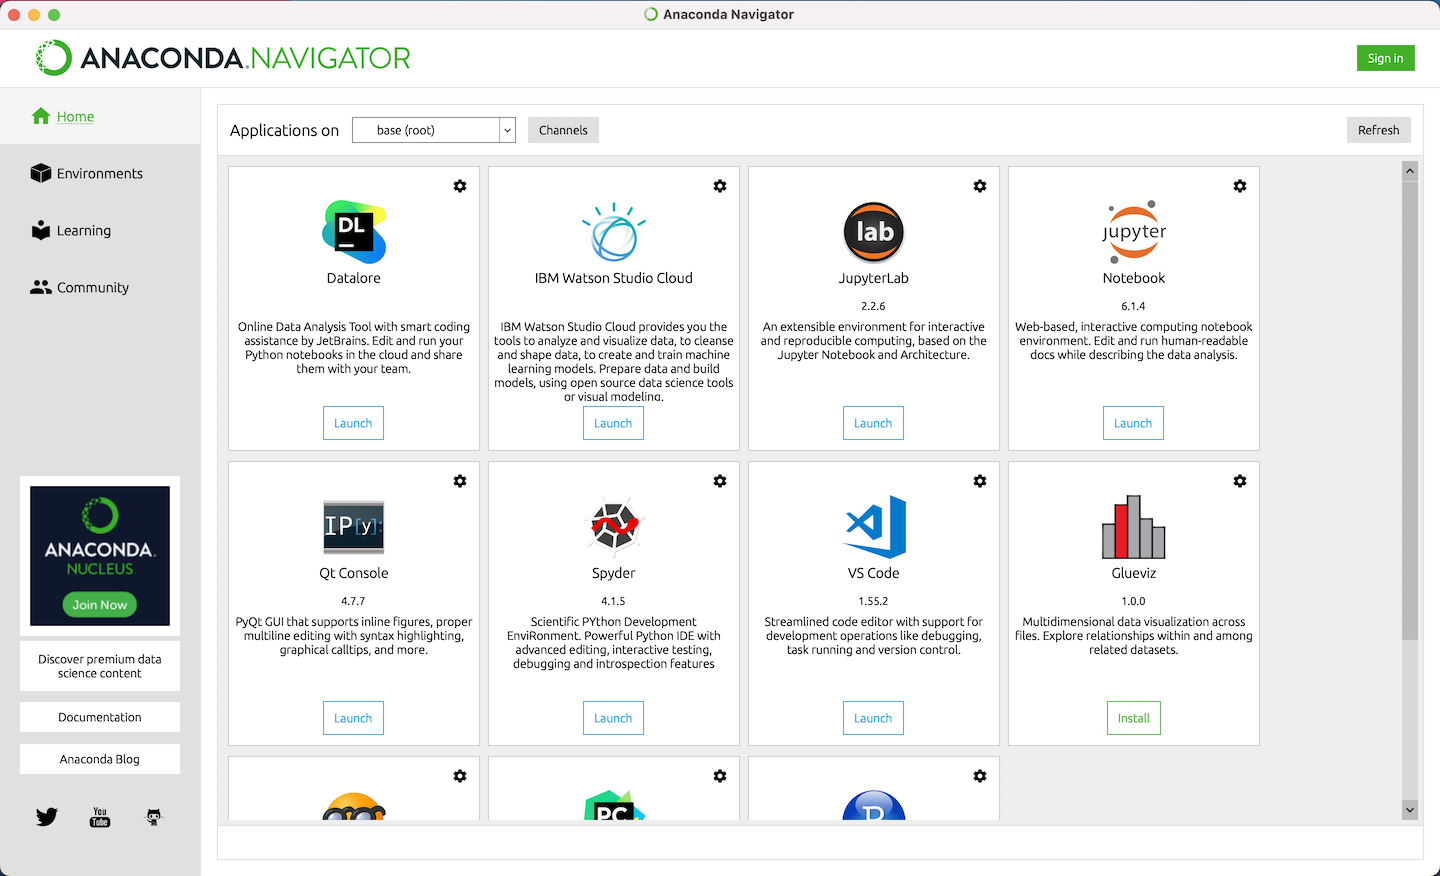
Figure 9 - Anaconda Navigator in MacOS